Saturday, April 9, 2011

The Best Part


We have all worked hard to install the skins:

Sabrina stole Daddy's tool belt in hopes that we would put her to work.

Samuel popping rivets in the bathroom

Annabelle is a two fisted helper... pop riveter and cleco pliers.

There are still two skin panels not fully installed.  The front panel was left open for battery installation and a little wiring.  A section of the long ceiling panel is still uninstalled so that we can add the eyebrow for the
 front door.  

Hey look!  What's that I see?  I think it's an aluminum tent!

Time for a reward for all of that work... our first trip!

Hitched up and heading to Fort Yargo State Park, Georgia.


The best part about camping... being with friends!

Wednesday, March 30, 2011

Nose Job


We have an ugly front panel.
  
 Very ugly.
Notice the line of corrosion in the middle of the panel.  Apparently battery leaks do bad things to aluminum.

As bad as this panel looks, it used to look worse.  In order to get it lookin' this perty we polished and polished and polished.  We patched holes...
 We considered making an extra large battery box to cover most of the panel.  
We banged out dents.

We still weren't satisfied.

On Monday, we decided that this panel "just won't do."  Fortunately, there's a company just south of Atlanta that stocks 2024 aluminum.  The kids and I drove an hour to Peachtree City, Ga to pick up some aluminum for the panel.
 
Time to take out the panel

This panel wasn't doing such a great job of protecting the aluminum under it.

 Brian used the removed panel as a pattern for the new one.

 It was dark by the time we finished bucking the rivets.

Much better!
We had talked about changing this panel lots of times... if only we had known how simple and inexpensive this project was, we would have done it earlier.
  

Tuesday, March 22, 2011

Stripping/Showing a Little Skin


We're stripping paint, putting the skins in, cutting holes for new outlets...

 
This is our ceiling.  On the floor.  
We've been working around/walking around this huge ceiling roll forever.

 We decided to take it out and strip it (again) before installing it.

Stripping isn't fun.
 It's much easier to do with horizontal panels though.
I'll spare you the picture of the inside of that 5 gallon bucket.  It's where I put all of the paint and stripper goo after I scraped it off... we call it the "puke bucket."

Warning!  Gratuitous side note:
Buying the stripper was fun. 
The cashier at the home store told us:
"You have to be 18 to buy a [can of] stripper."  Haha!
(She wasn't kidding though, it's the law in GA.)

Brian installing the lower curbside skin.  
Our headlamps are very useful in late-night Airstream restoration as well as camping.

We're so excited about working on the skins.
We're adding a total of 7 new outlets to our trailer.  For each new outlet, we have to make a cut in the skin.  So, the skin installation is taking a little bit of time but we're getting close.

Monday, March 14, 2011

Ends Capped


Here's what we've been working on since our last post:

Installed two inside fiberglass endcaps
cleaned the endcaps
more wiring
sealed some leaks (every Airstream owner's favorite task)
sealed some more leaks
made the frame for the new battery box
worked on a new drip cap for the front door
washed the trailer (first bath in a year, YIKES!)

Did I mention we installed the fiberglass endcaps?! We used 3 "third hands" and a farm jack to complete the job.  Stubborn things!  We were so glad to finally be successful at this task. 


Thursday, March 3, 2011

Lost in Translation

(from Brian)

My (overly-ambitious) wiring plans drag on, but the end is in sight.  All of the 110v wiring is done.  Check.  Now to finish the trailer lights.

When we purchased the trailer, the trailer lights (taillights, brake lights, turn signals) had been completely bypassed.  Temporary wires dangled under the belly pan and up the outside of the tail.  Not the least, the trailer brake wires were completely cut off.  This arrangement (sans trailer brakes) worked for almost the whole ride home before it blew a fuse in our tow vehicle.

flashback: our wiring looks so classy taped to the rear of the trailer and wrapped around part of the bumper

We had a bit of a snafu the first time I rewired the trailer lights.  The night before we moved out of our warehouse, we hooked up the tow vehicle and...nothing.  Since it was time to move out, I grabbed a 4-wire connector and ran some quick temp wires to the lights.  Once we were back home, I tested and found out that 4 of the wires on the molded Hopkins 7-blade cable I purchased didn't have continuity.  I assumed that I must have damaged it in some way during installation.

Months later, I finally got around to replacing the wiring pigtail.  I went back to the same store and bought another pre-wired Hopkins 7-blade connector.  I spliced it in, hooked up the tow vehicle, and... uh-oh.

The brake lights didn't work at all.  No left blinker.  The right blinker made the running lights on the left side of the trailer blink.  Crap.

I began to doubt my sanity and worth as a human.  Frustration rose.  Then, I began tracing down the wiring.

Turns out the color-coded wiring I bought is very different from what I expected.  On a 7-blade connector, the usual scheme that Hopkins uses for color-coding the wires is in this order, clockwise from top: brown, yellow, white, blue, green, black, with purple/red in the middle.  What I got from my pre-wired (Hopkins) connector was oh-so-different: green, red, white, blue, brown, black, with yellow in the middle.  Wow!  I really wish I had found the chart on this page to start with; I would have known that they used a completely different color-coding scheme.  It'd be nice if Hopkins would note that on their website.

It was an easy enough fix to swap the wires around and apply some colored electrical tape to avoid future confusion.  Woo-hoo!  The wiring checklist grows shorter...

Tuesday, February 15, 2011

Working Again!


After an 8 month sabbatical we're working on the trailer again!
  

Brian fabricated and installed supports for an air conditioner.


I installed fiberglass insulation.
Deja vu?!
You're right.  This wasn't the first time.
Since installing the insulation in April, our trailer has been through a whole lot of shifting and shaking.
(We buck-riveted in the windows and also moved it home.)

You can tell from the birthday picture that most of the insulation had fallen.


Norm suggested we install the insulation with 3M spray adhesive instead of masking tape.  I removed the paper backing and re-installed the insulation.
What a difference!  The insulation is finally finished!


I've always  been fascinated with this crazy photo in one of my Airstream books.  There's a guy in dress slacks and a lab coat installing the insulation with his bare hands.


We couldn't resist a photo reenactment.
note: actual fiberglass insulation installment is nothing near this glamorous

Look at all that progress!
Brian's getting really close to finishing the wiring.


Monday, February 7, 2011

The Rest of the Story


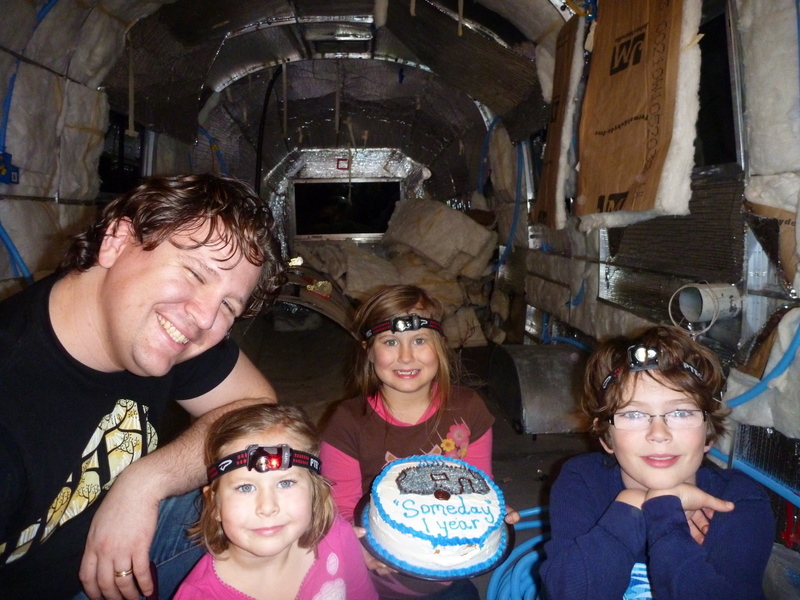
It's time to tell the story about how we got our Airstream:

I have wanted an Airstream since forever.  Forever being precisely 7-10 years.  I can't remember the exact moment I became infatuated with the shiny aluminum.  The earliest evidence is a photo snapped in 2003 of an Airstream atop Monteagle in Tennessee.  It was shortly after taking this photo that I expressed a desire to have my very own shiny trailer "before my 30th birthday."

My dream of having an Airstream was never far from my thoughts. But life got busy.  Suddenly, there were three Sanders children...and shortly thereafter, a minivan.  I was beginning to think the trailer would never be a reality... or at least not for a while. 

The fact that we didn't own anything to tow an Airstream nor have the funds for purchasing one did not deter me from looking for a trailer.  (No harm in looking, right?)

For two years I looked at trailers for sale.

January 2010
We were in the market for a new vehicle.

I was hoping for a not-a-van.  We went to look at a few mid sized SUVs with (some) towing capacity. We found them all to be too small for our family of five plus our camping equipment.

Shucks.  We'd have to wait a little longer for a tow vehicle.  Maybe we could get Brian a bigger truck in a couple of years and it could be our tow vehicle.

If our new set of wheels was going to be a van (again) then it was going to be a nice one!    Finally, we found "the one" at that big online auction place: only 2 years old, low miles, beautiful shiny red, leather interior, sunroof, DVD package!  Perfect!

Nervous about buying a vehicle we'd never laid eyes on, we talked to the seller and asked lots of questions.  We studied the pictures of the van looking for the slightest flaw.  (A picture is worth a thousand words, right?)  We bought the Carfax report.  We took comfort in the fact that the van had been through an independent inspection.  Our fears subsided.  We bid on the van; we won.  We sent a deposit.  Brian and I giddily made arrangements to fly to Tampa to pick up our van.

When we got to the Tampa airport things took a strange turn...
We were blindfolded and transported from the airport in a green panel van to the dealership.  Finding ourselves in an overgrown gravel lot next to a strip club, we took keys from a shifty-eyed man who suggested we take our new van for a test drive.  He motioned to a dirty red van surrounded by weeds. 

Maybe I'm exaggerating a little.  I made up the part about the blindfold and the panel van.
Allow me to continue....

The stench of mold and mildew filled our nostrils and soured our stomachs the moment we opened the door. Feeling like sleuths in a Nancy Drew novel we began to investigate.  It didn't take us long to find a large hole in the carpet, mildew on the seats, and a water line on the driver side door.  Our van had clearly been flooded and certifiably misrepresented.

Mr. Shifty-Eyes had an explanation for everything.  The mildew, it seems, was on the seats because the car hadn't had an opportunity to dry out after it was detailed.  (Really?  If it was detailed then why were there still cheez-Its in the seat pocket?)  We complemented Mr. Shifty-Eyes on his precision.  A stack of floor mats had been placed exactly on top of the hole in the carpet for the van's photo op.

Under no circumstances were we going to bring the flooded van home.  Armed only with our laptops and a GPS (note:  I did not say cell phone) we began thinking about how to get ourselves out of this mess.   The GPS said there was a car rental place 4 miles away...not too far to walk.  Brian was eyeing the *ahem* "bar" next door where he thought we could use the phone to call a taxi.  Ultimately, we took the green panel van back to the airport... this time without the (metaphorical) blindfold but with a constant narration from Mr. Shifty-Eyes' partner about why it was all Mr. Shifty-Eyes' fault.
I wished we had called a taxi. 

Four hours later we were on a flight back to Atlanta. 

The idea of a buying a van was sour.  Again, I poured over the Consumer Reports list of "best cars" for something, anything, that could haul around our family and an Airstream.  I had new motivation.  A trailer came up for sale.  Not just any trailer.  A 50s Airstream.  My dream! 

About a week after the online-auction-dream-van-turned-nightmare fiasco we were sitting behind the wheel of our new tow vehicle...a Toyota Sequoia.

Now to sell the minivan:  I used a ton of elbow grease to wipe off three years of kids and camping; took some pictures; posted an ad.  Within 24 hours of posting the ad someone came and paid cash for our minivan.  

I called about the Airstream.

As Paul Harvey said... now you know "The rest of the story."

I'd like to take this moment to thank Mr. Shifty-Eyes and his partner for screwing us over.  If he hadn't tried to sell us his flooded van then I'd still be perusing those Airstream ads.

P.S.  If you must know, we didn't quite make the "before my 30th birthday" goal... but we were pretty darn close.