Monday, March 29, 2010

Lessons Learned


We didn't get to devote as much time to the wiring this weekend as we had hoped.  Instead, we learned many valuable lessons.  


Things we learned:
  • Orange 10/2 wire does not fit well through 1/2 inch conduit.
  • Not even if you use a fish tape.
  • Not even if you lay it out straight on the ground.
  • Not even if 2 adults and two kids are working on it.
  • The belly pan has lots of rivets.
  • The belly pan has almost as many hidden rivets.
  • You have to open the curbside access door to reach some of the hidden rivets.
  • It would have been nice to have a key to the curbside access door.
  • It takes a long time to drill out the access door lock. 
  • A shell-on restoration can be just as scary as (the thought of doing) a shell-off restoration.
  • Before it was removed, the belly pan helped keep the shell on the frame.
  • Once the shell starts moving off the frame it can be difficult to get it back on.

We're at the back of the warehouse stretching the conduit and 10/2 wire out straight.  We spent way too much time trying to make it fit.  It wouldn't work.  The 10/2 wire is for the main power source.  We've decided to run it through the walls by itself and run conduit beside it.  (Running conduit makes it easier to make changes or updates to the wiring at a later date.)

 
Drilling out the hidden rivets.  These were underneath the outside skin and went through the belly pan and the C-channel on the inside of the trailer. 

  Removing the remaining belly pan was an all-day job for one person (and sometimes two.)  Here you can see the front streetside of the belly pan is removed.

Curbside access... this is where we had to "break into" the door.  We're glad we don't know how much time it took us to get in this door.  It was a long time.


Yikes!  The skin is "floating!"  It's supposed to be resting on the frame.

It's not resting on the frame on this side either.  The skin is lower than the frame on this side.

Should we rename her "Ilean?"
It's funny now... but the teetering skin was super scary!  I'm ready to get the floor in and be done with this teetering skin business.  We still have to get the tanks (gray and backwater) before we can put in the floor.

Fun with clecos.  (Clecos line up rivet holes and act as a temporary rivet.)  We used clecos around the outside skin to connect the skin to the C-channel on the inside of the trailer. 

Oh, look.  We did get a little conduit run this weekend...just not as much as we thought we would.

Saturday, March 27, 2010

Sealing Steel


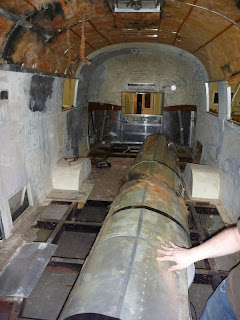
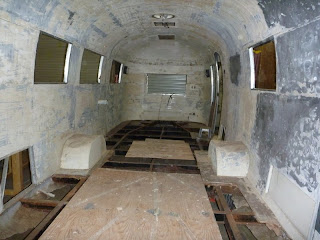
We're almost exclusively rebuilding now.  Brian worked hard this week to get the remaining (stubborn) edges of the floor out.  There were narrow sections of the floor left around both wheel wells and a then in front of the wheel wells toward the front of the trailer.  He also took out the door step.  We had hoped to be able to reuse the step but there wasn't much left;  It had been patched many times.  Now, there's only one thing left that has to be removed... a strip of the belly pan is still attached with rivets all the way around.

I painted the frame this week.  First, I used a rust-sealing primer.  (It seems odd to us that the rust-sealing primer comes in "rust" color.  Did I miss a spot?)

Then, I used aluminum Rustoleum for the top coat.

Sabrina brought the hand sanitizer to me when I was done.  "I think you need to clean your hands, Mommy."

Moving time again... the office space that's holding the trailer "guts" needs to be vacated.  We're hauling some things home and some to the shed outside.

Hauling part of the inside skins home.  We don't recommend this method for transporting skins....especially if it's windy.


Monochromatic aluminum.

Fun with Electricity

It's time for one of my favorite parts: electricals.  The original 50's wiring was a bit scary and not entirely functioning.  Sounds like a good excuse to start from scratch.

I started on the electricals a couple of weeks ago.  You may have noticed a bunch of obnoxious blue pipes and boxes all over Lynnetta's shiny new insulation.  These plastic tubes are ENT conduit.  They protect the wiring from errant rivets and make it easier for me to add additional circuits later.  

The master plan on the left, and the three mugs of coffee it took to put it together on the right.

Just in time, the brains of the operation arrived.  It's a Progressive Dynamics all-in-one AC breaker box, DC fuse box, 120v to 12v converter, and battery charger.  It's going under the street side twin.

Monday, March 22, 2010

100 Days

It's official.  Our warehouse lease ends on June 30th; a new tenant is moving in.  So, we've got 100 days to finish up everything we need/want to get done while in the warehouse.

Someday in Spring


Friday was a beautiful day.  We camped at Red Top and took the kids fishing for the first time.  We woke up to a beautiful first day of Spring.  The kids headed to the zoo with their aunt and cousin. Brian and I headed to the warehouse about lunch time.

I was determined to finish the radiant barrier insulation this weekend.  This piece is cut to fit in the end-cap.

One end-cap section installed.  Three more to go.

Brian's busy running blue conduit all over.  The access panel for this box will be inside the cabinet above the kitchen sink. 

Sunday the kids enjoyed carrying 20 feet each of 2/0 gauge wire.  It doesn't look like it, but this stuff is extremely heavy.  The 2/0 gauge wire will run between the battery and a control panel.

The last panel to get covered... the one with the (51 year old) "Hello People" message.  We left our own message.  Think someone will find it in 51 years?  Our trailer will be 102 years old in 2061.

Ta-da!  Insulation finished!

This restoration sponsored by Caribou Coffee...well, it should be anyway.  It's conveniently located between our warehouse and the home store.  Thanks to Caribou for sponsoring all of our extended hours at the warehouse this weekend and every weekend.

Thursday, March 18, 2010

This, That, and the Other...

Saturday SAM welded the frame in the front of the trailer.  It looks terrific!  
We're almost completely done with the frame...just need to prep and paint it.

Everything in front of the board is completely new frame.  Thanks so much to SAM and family for sacrificing two Saturdays in a row!  Tent or trailer...we can't wait to camp with you!

Brian's first "electrical" purchases.  Romex and shallow electrical boxes.  They weren't quite shallow enough though, Brian had to make them shallower.

I've been working hard on the (pretty) radiant-barrier insulation.  Ahhh!  Now there's green tape all over it.  Oh, it's just Brian's tape.  He's starting to map out the electricals...I guess I'm a little partial to shiny silver things.

There's an outlet on the outside of our trailer, to the left of the door.  Brian replaced this outlet with an updated plug  (read= GROUNDED plug.)

Here's the new plug from the outside.

We finally got a better look at our vents and vent covers.  We thought  they probably weren't original because at least one looked  rickety from the ground.  It turns out that two of the three have the original Hehr covers.  The cranks work too!  I had no problem opening and closing this vent.  (Well, no problem after I got a stool to reach it.)  There are wires here.  I'm not sure if something was attached to this vent previously (like a fan perhaps?  a light?)  Maybe the wiring was for an option our trailer didn't have.

After we removed the screen and wasps' nest, this is what's left of our "Astradome."  It would have been a pop-up skylight.  This vent cover is not the original and is attached rather grotesquely from the outside.  I can't wait to order the reproduction replacement from VTS.  (How much longer could this thing possibly be back-ordered?)  Oh well, we could camp with this crazy cover a time or two.  I can say one good thing about it.  It doesn't leak.

I'm making some progress on the radiant barrier insulation (i.e. silver bubble wrap.)  How fitting that this stuff was developed by NASA and we're putting it in our Airstream.  NASA put the astronauts in an Airstream.  We put the NASA (technology) in our Airstream.
 
It's starting to look pretty shiny.  I still have to finish the end caps and a few more panels.  This stuff took far longer to install than I expected.  Every section is a different size so it just takes time to cut it all out.  When I'm finished with this insulation I will  work on the fiberglass (itchy!) insulation.  In the meantime, Brian is excited to finally be working on the electricals. 

Without even noticing, I think we're starting to put this thing back together.... how exciting!

side note for the very observant:... This post says it's created by "Brian." It's actually created by me, Lynnetta. I must have been logged in as Brian when I created the post.  I have no idea how to change the author.  Sorry.

Tuesday, March 9, 2010

Framework & Skinning

Saturday we took the trailer to our friend SAM's (Swiss Army Man) workshop.  He and Brian worked on part of the frame.  They modified the bumper so that it attaches to the frame with bolts (instead of being welded straight to the frame.)  It looks super! Thanks SAM!

rear of trailer before the welding, no bumper


rear of the trailer after the welding, bumper attached

bumper bolted to the frame


We've discovered that we have a rather "unique" spare tire holder.  Since this modification has been around for quite some time, we've decided to keep it.  We're glad we have a beefy new frame to compensate for the weight.


Sunday, we removed the inside skins and insulation.
drilling out the rivets to remove the inner skins... what a ton of rivets!

We learned some things:  After you drill out the last rivet (there's always some pesky hidden one) then you'd better watch out! The center ceiling skin was one big hunk of aluminum.  There's nothing like trying to get the last few rivets and wires disconnected while 12 feet of aluminum falls on your head.  We rolled it up and tamed it with duct tape.  Whew.  Time to take it out...

 
 ....through the front window.

center ceiling skin (and insulation) removed

Inside the skin, we found a 51 year old message from the Airstream manufacturers "Hello People."  Hehe.  Hello Airstream.  We sure do like it when you talk to us.

It's a skeleton!  Inside skins and insulation removed.  We filled 7 contractor-sized bags with insulation.


Thursday, March 4, 2010

Tackling the Floor

We've been up to the warehouse a couple of nights this week. We finished removing the floor and made some progress on the decals (only 6 more to go!)

The floor removal was easier after upgrading the saw blade.


Brian is using an angle grinder to remove the elevator bolts.  (I've never been a fan of the angle grinder.  I must be getting used to it.  I found the crow-bar and heavy duty hammer removal method  far more frightening.)

Frame damage in the front.  When he came to look at the frame, SAM said the tongue didn't look right and suggested we finish removing the floor before he started the weld work. 


Could this be the reason that the tongue isn't exactly level?

Trailer trash!  Time to clean up the mess that used to be the floor.

 Floor's out!

Our floor in the back of the Sequoia... loaded up to take home...